Oct 23
Master Lock 572 Padlock – My Cutaway
I figured I would start with a cheap rekeyable padlock. This is a MasterLock 572 bought from a Home Depot with a price of about $13. Aside from the cheap factor of this padlock the key feature was the fact it was rekeyable. Making cutaways of non-rekeyable padlocks is a whole lot harder than rekeyable ones (although not impossible, but that is for another time). It was primarily a practice but came out pretty well. Read on for the how to…
Something just about anyone can do, and using some fairly cheap tools for the process. First of all the tools:
- Vice (to hold the lock, its a lot harder to file something you are holding)
- Large File (filing down large portions of the lock)
- V File (just a file with smaller surface area contact, useful for filing away the actual pin chambers on the cylinder)
- Needle or Riffler Files (for pin chamber filing)
- Dremel – for cutting through the lock
- Metal Cut Off Wheel – attachment for dremel to do cutting
- Pin tray (or something to put the pins in)
- Top Loading Tweezers (these just make it easier to repin the cylinder, but many people just use a pick)
Now technically as long as you have a vice and a medium grade file you could do this, however its not suggested (it will involve hours of filing).
First of all we need to break the lock down into its parts. Unlock the lock and then you will find a screw in the shackle hole. Remove your key from the cylinder (if it is in it) then unscrew that screw. Once unscrewed you can remove the retaining plate on the bottom (hit it once or twice if it doesn’t drop right out). It should look like:
Once the cylinder is free from the lock we need to mark what part of the cylinder we are going to file down later. There is a very crucial part here, and that’s making sure you are filing down the right side. Imagine what part of the lock housing you are going to cut away to make your window, and then physically place the cylinder back into the housing so you know what side of the cylinder housing you are going to cut and mark this side.
Now we will remove all the pins and springs from the cylinder. Looking at the back of the plug (where the key does not go in) and there should be a metal retaining clip, remove this clip (using a flat head screwdriver works well). Once removed put they key into the plug and turn it 45 degrees in either direction. Next we are going to pull the plug out from the cylinder, as we do this the top pins and springs are going to shoot out the back of the cylinder, its best to do this with the back of the lock angled down towards a table (with a hand cupping or some sort) so you don’t lose any springs or pins. Slowly push the back of the plug until it is free from the cylinder, put all the pins and springs that fell out into your pinning tray (order doesn’t matter on the top pins and spings). Next remove the pins from the plug and put them into your tray in order.

Now we will start by filing the cylinder down so you can see the pin chambers. Lock the cylinder into the vise. Now it is important here to make sure of two things, first of all that the side you marked to file is facing up and fairly flat, secondly that you don’t tighten the cylinder in the vise the wrong way. If possible you basically want to put pressure on the ends of the cylinder and not on the body itself. If you put the cylinder into the vise sideways (so the pressure is on the the sides instead) and tighten it too much you won’t be able to rotate the plug in the cylinder freely, and the lock is ruined (no matter how hard you try to bend it back). Also if you are going to clamp the sides make sure to put some padding(paper towel works fine) between the cylinder and the vice to avoid scratching.
Now deciding exactly how to file down the lock is a bit tricky. I chose to leave a slight gap between where I filed and the plug chamber, primarily to ensure that I don’t file to the sheer line, as I wanted to ensure it felt the same as if it wasn’t cutaway (at-least as close as possible to it). To do this I put the jaws of the vice slightly beyond the plug chamber so the file wouldn’t be able to move any closer to the sheer line. I then used the triangle file to start filing. After filing down for awhile (it will take awhile) you will start to get to the pin chambers.
At this point you will want to file down until you can see all of each pin chamber (be careful to not file for much longer than that otherwise the springs may not stay in properly). At this point using the needle files to clean up the chambers until they are fairly even.
Next we can repin our cylinder and put it back together. I loaded all the springs in first, then loaded the plug with the bottom pins and used the plug to follow as I loaded the top pins in (just make sure you put the cylinder in the right way and not the back). Depending on the cylinder you may be able to load the pins differently, mainly just get it back together. In the end it should look similar to this:
Now its time to mark our padlock for where we want to cut our window. There are a couple key things to doing this: A) The retaining bracket must be able to still lock into place which means the hole in this case on the left had to remain intact. B) It is easier to remove more material later (and you will have to when filing to make it smooth) then add it back. Here is how mine looked:
Next put the lock into a vice (make sure to not touch it directly to the metal clamps, paper-towel will work, just so it doesn’t scratch). Now dremel away what you have cut out. Originally as you can see where the sides meet I had it going straight down the side, unfortunately I couldn’t cut this without cutting into the lock more than I wanted to, so ended up with something like this:
In the end I just cut it on an angle through, it actually looks good this way and made filing later easier. The edges now will be rough, take a file to them and file them down until they are even and smooth. In the end you should put it all back together and have a fairly good cutaway.
Now there are some things that went wrong or that I would correct the next time through:
- Be careful of your lock, take an effort to ensure it doesn’t get scratched or touch any other metal
- Make sure you are going to be able to see the pins, originally I didn’t file close enough to the sheer line and had to file that down more later and that actually caused some problems (if you look carefully at the chambers you can see the part closest to the plug housing is filed down more than the rest and causes the holes to be bigger in the chambers too)
- If this was going to be for show you should follow up filing with sand paper, it will give it a much better shine
Also some questions for those who may have some ideas:
- Anyone able to confirm what type of lock this is? 572 is the only number I could really find, there is a photo here of the package.
- If you have any ideas on how to do more exact filing of a specific area (I thought maybe taping areas not to file, but thought the files would probably tear through the tape)
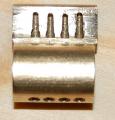
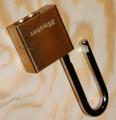
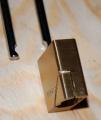
Thanks all here are some final photos, you can find more in the gallery:
2 comments2 Comments so far
Leave a comment


decision-making matrix + financial therapy decision matrix analysis decision matrix engineering engineering decision matrix decision matrix decision matrix example decision matrix criteria examples decision matrix criteria decision matrix criteria li…
Making The Cut – Mitch Capper
fake id meme
Making The Cut – Mitch Capper