Nov 29
Duo 14 Tumbler Cam – My Cutaway
The Dirty Duo. The Duo lock is somewhat unknown among lock enthusiasts, often looked at as a simple wafer lock. The Duo, however, is not everything it seems, as it features a non-reversible key and generally found in 8 or 14 tumbler versions. The higher end Duos’ feature more than the standard double bitting (cuts on the top and bottom of the key) and are triple bitted (having two parallel tracks on the top of the key, and one on the bottom). In addition, the Duo uses one spring placed between every two wafers (one pushes up while the other down, countering each other and making it harder to manipulate) unlike standard wafer locks. On the tripple bitted keys the lock does not use split wafers like some wafer locks, but rather one of the tracks is actually a side track (set slightly lower than the actual top track). I decided not only to make a cutaway of this lock but to do some restoration work for cosmetic and functional purposes. So let’s continue…
The last two blog posts I had someone review them, Jaakko actually helped with the entire Abloy project, but even on the Masterlock I had someone review it before posting. This has worked out, and this time Doug Farre (of Locksport International Texas Edition) was kind enough to review it. He seems to have some affinity to proper English, so if you find this to be easier to understand than normal, you can send thanks his way. I would also like to thank Graham Pulford who’s latest book “High-Security Mechanical Locks” provided great technical detail to help clarify how this lock works.
While I do have a new unused Duo, I decided to use this one instead (both are 14 tumbler versions). I purchased this one along with a few other Duo’s very cheaply on EBay. They were fairly old, in somewhat poor condition, and the key did not flow very well into them. While I was originally planning on doing a milled cutaway as my next example, the mill is awaiting some new parts (DRO and more bits). To that end I decided to choose this Duo as it would allow me to detail some restoration techniques. Let’s start with some pictures of the lock as I received it:

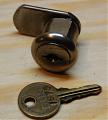
As you can see, they are not in overly great condition. The face has a gouge in it, and the metal is fairly warn over. The following are the tools I used:
- Vice – holding the lock during dremel use (generally using your hand can lead to some nasty cuts)
- Two sets of files – diamond(rough) files for removing larger amount of materials and fine files for finishing work
- Dremel – used to drive the following tools:
- Wire wheel – used for cleaning up metal parts of the lock to remove dirt and corrosion
- End mill bit – used for cutting the window in the metal to view the wafers (Dremel calls it a Tungsten Carbide Cutter)
- Cut off wheel – to cut a guide line for the end mill bit
- Flathead screwdriver – to remove the cam from the back of the lock
- Emery sandpaper – (200/400/1000 grit sheets i used) for fixing the face of the lock, removing the gouge
- PB rust remover – removes rust from metal along with general cleaner, also works as a lubrication
- Brake cleaner – another cleaner works well for getting grease and anything else out, will remove the PB Rust lubricator left behind after it does its dirty work
- Marker – used for marking the wafers to keep them facing the proper directions
The very necessary tools are the Dremel with a cutoff wheel (or an endmill bit), as always you could technically use just files but it would take you awhile. You also see the Dremel flex-shaft attachment and multi-tool work station, neither are needed but both make the process easier.
For taking the lock apart I suggest you leave the key in the plug at all times and never pull the plug by the key. If the key comes out and the plug is not in the housing your wafers and springs will go everywhere. This is about as bad as with an Abloy:) Next we need to unscrew the flat head screw holding the plug in, and then slowly remove the plug from the housing. You should end up with the following:
It is at this stage that I decided to clean everything. It would have been better if all the wafers were separate. but this was much easier than keeping track of all the indivudual wafers. I took all the pieces and put them in a small bowl, then sprayed them all with the PB Rust Remover and let them soak in the bowl. I also switched between having the plug separate from the housing and the plug in the housing while spraying in the keyway. After about 5 minutes I emptied it out, washed the bowl, and did the same thing with the brake cleaner. After mixing it around and letting it sit again I dried the pieces on some paper towel. It started to look a little better at this point:
The following few steps(taking the wafers out and putting them back in) are not required if you are just making a cutaway, however if you are looking to restore/fully clean the lock then I would recommend it. Now each wafer technically has several different ways it could go into the plug. The wafer could be flipped vertically or horizontally causing it not to work (not to mention getting them out of order). There may be some way to tell the way a wafer should face, however it is far easier if we just mark them while they are in the correct order. I used the sharpie to make a solid line on the bottom of the plug across the top of each wafer (top as in not in the center of each wafer, so that I knew if the wafer was flipped horizontally). You may have to move the key in and out slightly to make sure you hit all of them (just be careful to not let any wafers come out while doing this. Next comes dis-assembly, during dis-assembly we care about two things, the order the wafers and not losing any springs. Remember, for every two wafers there is one spring. Keeping the springs in order doesn’t matter but the spring for the two wafers closest to the front of the plug did seem smaller than the others. Start at the back of the plug and slowly pull the key out, taking a wafer out at a time and laying them down in order (set the springs aside). Once done they should be similar to:
I would like to stop for a moment and talk about the wafers. There are three different cuts on a key: top, bottom, and side which means there are 3 different types of wafers that move (top,bottom,side) and a fourth profile wafer that is static. The wafers are always in order (top, bottom, side, profile), but don’t let this fool you, this lock is still very hard to manipulate. Each wafer is paired with another wafer (by sharing a spring) by moving one up or down you are changing the pressure on the other. In addition the wafers have anti-pick notches in them, and are extremely thin with no spacing wafers in between (making manipulating one at a time very hard). The profile wafers are fixed and guide the key, but also make it harder to manipulate the side wafers due to the extreme warding.
Now we need to clean each wafer, we are going to just use the wire brush in the Dremel (on a fairly low setting of 2-4) to do this. When you do this there is a good chance you are going to be removing the sharpie marks, so before you do each wafer you must remember where its mark is and then re-add it after it is clean. You could technically just look at its partner wafer (as it will go the same way), but I find it easier to just keep track. I would pickup a wafer holding the non-marked end, and look at the marked side, remember if it was on the same side as the spring or not (the spring side has a cut in the side of the wafer where the spring goes. Then I would run the front part of one side of the wafer over the wire brush, then flip sides of the wafers and do the other. Then I would flip the end I was holding and do the same on the other side, and then finally re-mark the wafer and set it down. The wire brush setup in the Dremel and in the multi-tool station:
The following picture is where about half the wafers cleaned (and then another where all the wafers cleaned):
Next we need to clean up the plug itself; You can see where it has that nasty gouge in the face that we need to remove. I started with filing it out until it was gone. This heavily scraped the face, so I proceeded on to the sand paper. The 200 grid sand paper is fairly rough and will help smooth the grooves from the files, but still leaves the lock face looking nasty. Following up with the 400 and with the 1000 grit until you get it nice. To do the sanding I alternated between the sand paper on the table and rubbing the plug on it, and putting the sand paper in my hand and grinding the plug against it in the palm of my hand. The second method allowed me to better apply it to the roundness of the face. You want to make sure you don’t take too much off, just clean up the surface so it looks closer to new again. I also ran the rest of the plug body over the wire brush to help remove grit along with the cam piece.
Next I cleaned the key with the wire brush; it really helped restore the key. Here is a picture of the key half cleaned:
Now we need to reload all the wafers into the plug. The best way I have found to do this is not to put the spring in with the wafers but only after the wafers are partially in the plug. I started at the front of the plug and would load four wafers in at a time. Once the four were in I would go back and load the two springs. I push out the first two wafers about 1/2 to 3/4ths the way so I could see the hole for the spring and load the spring in. I then push the wafers back in, flip the plug over (as you will note the springs alternate sides for the most part) and do the same with the second pair of wafers. I would push the key forward a bit then would load four more and continue this until they are all loaded. To see how much the wafers would be pulled out here is a picture just after I inserted a spring into a pair of wafers:
Next I took the wire brush tool and ran it over the sharpie line on the wafers removing the black mark we made previously. Now we need to make the actual cutaway into the outer housing so you can see the wafers. We want to make the cutaway at the top (or bottom, as they are the same) of the housing, in the part where the gap above the wafers is so they can move up/down and you can pull the key out. I placed the outer housing into a vise (be careful not to grip it any tighter than needed for fear of altering its shape) and use the cut off wheel to cut a slit down the side of it:
Next I took the end mill bit and basically widened this hole to approximately how wide I wanted it. I wanted to be able to look one way and see the cap in the plug above the wafers where they could move up and down, but also the other way you could see no gap in which they had to fit under. Keeping in mind that I was going to file it down later on I went in with the endmill bit and widened the slit:
If the dremel could be used like a true milling machine it would have been a lot more perfect, but instead we must now file. I started again with the diamond files to roughly even it out and then moved on to the finer files to end up with:
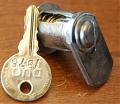
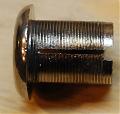
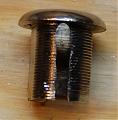
Once that is done, clean it off, and put everything back together. You now have a Duo Cam Cutaway! Some final pictures:
Notice the cleaned up face, the gap on the right side of the second picture, and the lack of a gap on the left size of the 3rd. Enjoy!
2 comments2 Comments so far
Leave a comment





Hi – I have actually been looking into using a Dremel and the Dremel work station/drill press to make some cut through locks. Some reviewers on Amazon.com have said that the work station is made poorly because it uses some plastic and it not fully metal, and thus it is not very accurate and there is quite a bit of play when using it. What is your experience with the work station and which work station do you own? Is it this one:
http://www.amazon.com/Dremel-220-01-Rotary-Tool-Station/dp/B00068P48O/ref=sr_1_1?ie=UTF8&qid=1311050627&sr=8-1
You also mentioned you could do it with out the work station and the flex shaft – is it really possible to get accurate enough cuts this way?
Thanks!
Adam
_______ _____pg
Making The Cut – Mitch Capper