Oct 30
Abloy Protec Mortise – Factory Cutaway
The Abloy Protec lock is one of the most secure cylinder locks in the world. It is currently the second most secure lock that Abloy offers, only superseded by the Abloy Protec CLIQ, which is the Abloy Protec with an additional electronic chip. I recently acquired a factory cutaway and figured how best to celebrate but to photograph and disassemble this beautiful beast.
I would like to specially thank Jaakko Fagerlund, an Abloy expert, for not only direction on the breakdown but also technical review of this article. If you are lucky enough to be going to the upcoming Dutch Open you will be able to catch him speaking there. We have a lot to cover, so let’s get started…
Abloy locks are disk detainer locks, and while small adjustments have been made to the system, the basic idea has stayed the same. You have a plug with several circular disks in it, each disk has a small notch(gate) at a specific location. In addition there is a metal locking bar that sits in a small cavity in the cylinder above the plug. The locking bar is what is responsible for preventing the plug from spinning. You insert a key with angular cuts into the plug and turn it 90 degrees. This rotates the disks various amounts so that the gates on the disks line up and the locking bar can drop down into the plug. At this point the plug can be rotated further to lock/unlock the lock. For more details on how Abloy locks work I encourage you to check out Toool which has an excellent Abloy series by Han Fey, including Part 3 which focuses on the Protec. I will talk about one additional feature of the Protec, just so those who don’t know will be able to follow the pictures, that is the return bars. The return bars serve two main purposes: at rest or when the lock is opened they keep individual disks from moving (either due to physical movement during transportation or otherwise), they also ensure the disk return to their positions when the key is removed. Two are required for this lock as it can be turned both ways, for more details see Han’s series.
I figure I would start with some operational pictures:
Pictures at rest: Key and lock | The return bars and bottom of the cylinder | Locking bar above the disks
![]()
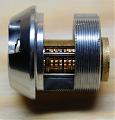
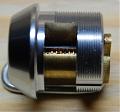
Pictures at 45 degrees of rotation: You can see one of the return bars moving and disks spinning

After 90 degrees of rotation the locking bar may automatically drop into the plug due to gravity, however if it doesn’t then once tension is applied the slope in the locking bar groove will cause it to enter the plug.
Pictures : Locking bar dropped into the plug | Return bar has reached the other return bar and the disks are aligned


Pictures after additional rotation (unlocking the lock): Locking Bar in the plug | After about 280 degrees of rotation to the right | After left rotation instead of right


Now onto the fun of taking it apart! Before one goes about disassembling any lock you should make sure your workspace is clean, and you aren’t going to be interrupted by a phone call, an animal, or zombies. The last thing you want is pieces to go everywhere or get out of order, especially on an Abloy. In addition, if the lock you are taking apart is dirty some Kerosene, Acetone, Brake Cleaner, or Turpentine will allow you to clean your lock while taking it apart.
To start we need to remove the cam from the back of the lock. First we need to unscrew the cam, and then apply some pressure to pull the cam off. It is important make sure to do this with the back end up so the plug doesn’t come out.
Pictures: Cam Attached | Cam Removed
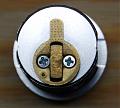

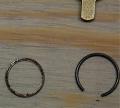
Next we need to remove the retaining clip that sits just inside the plug, I used a small flat head screwdriver(inserted into the lock bar notch) to do the trick. After this we need to remove a metal washer sitting behind it, a few taps to the cylinder while upside down should do the trick (again make sure to hold the plug in the cylinder while tapping).
Pictures: Retaining Ring | Retaining Ring Removed | Washer and Retaining Ring

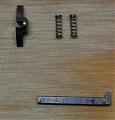
Next we want to push the plug out a small amount so we can see the locking bar bracket and springs, I did this with the key in the lock, but you should just do it by pushing on the front of the plug slightly. Once you can see the lock bar bracket you can remove it, and the two springs under it.
Pictures: Locking bar bracket and springs in plug | Springs still in plug but bracket removed | Springs removed


Next we want to pull the entire plug out, the locking bar may drop out at this point (or the silver profile disk), but don’t worry. Tilt the back of the cylinder down and slowly push the plug out, making sure to hold it as it comes out as it may come apart otherwise. Once done set it down and set the locking bar aside.
Pictures: Entire plug outside of the cylinder | Locking bar aside with bracket and springs

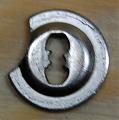
If the profile disk did not come out during removal it is most likely stuck in the front of the cylinder, tap it until this comes out.
Pictures: Profile disk in cylinder | Profile disk removed

Next we need to remove the disk controller. To do this put the plug vertically on the table, and slowly pull the disk controller off while holding the plug.
Pictures: Disk controller on plug | Plug with disk controller off | Disk controller on its face

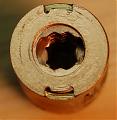
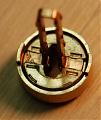
Now I want to stop for a second and talk about the disk controller. The disk controller is the only piece of the lock I did not fully disassemble, this is due to the fact I was told it came from the factory in one piece, and it did not come apart easily. It also looked like it would be very hard to put back together due the springs, and the fact it may be partially crimped in place. Aside from this the disk controller has two important functions. First ensures that the key is fully inserted before you can start rotating (as with Abloys without this feature you can rotate at any point which can prevent the key from being fully inserted or removed without rotating back to start). Second it guides the key in so that minimal contact with the other disks occurs on entry, this helps avoid a disk spinning by mistake and blocking the keyway (along with reducing wear). By using the dimple on each side of the key the disk controller can prevent premature rotation. There are ball bearings that extend into the outer part of the disk controller when they key is not fully inserted preventing rotation. Once they key is fully inserted the dimples on the side of the key allow the ball bearings to push into them, allowing for rotation of the plug. My key has two dimples per side, however only one is used by the Protec. You can best see the ball bearings here:

Once removed we can now remove the front locking washer and return bars. First remove the washer from the top, then you should be able to see the two silver locking bars. At this point you can flip the plug over (while holding the disks in place) and the return bars should drop out.
Pictures: Washer next to plug, return bars visible | return bars removed from plug


Next we need to remove all the disks, you can do this one of two ways, either by removing them from the plug housing, or by sticking the disk controller back through them, flipping it over, and doing it that way. I did it the latter, but the choice is yours. The important part is to keep the order and direction (facing up /facing down) of the disks correct. If you do mix up the direction look at the pictures below, or know that all the disks go embossed side down during assembly.
Pictures: Disks on disk controller | disks placed in order on table (Top right disk is the disk closest to the back of the cylinder)

![]()
At this point everything should be disassembled; if your lock is dirty you can clean the metal pieces with your solvant now.
Picture of all the components:

Now to put it back together, this was certainly the hardest part, and is especially hard without the proper tools. The tricky part is loading all the disks back in to the plug housing. I will explain the way I did it, and then I will explain the way I think you should do it, and finally the way I received from an Abloy specialist. What you should understand is that there are 3 types of disks. Ones that have a single deep U gate in them, ones that have lots of small false gates and shallower real gates (generally two but sometimes one in the middle depending on the bitting), and finally ones with shallow gates but no false gates (that also look like they hug the key). The first ones are primarily washers, the U gate on each of them interfaces with the locking bar and allow the washers to stay in place, the second work with the return bars and the locking bar, and finally the third are control disks used for moving the return bars. You definitely want to align the first locking bar disks (so there is a straight groove for the locking bar). I also believe you want to try and align the second type of disks for the return bars, however this may not be overly important(I have not tried without aligning these). I thought the best way to do this would be to mount them on the disk controller with the key in the disk controller. To do this I put the key in the vice (with some padding to avoid scratching) and used two things to align the disks: A) tweezers to align the locking bar groove (any flat piece of steel will do this) and B) a small flat-head screwdriver to rotate the disk once I placed it on the disk controller.
I didn’t constantly use the tweezers just every now and then to ensure the groove lined up. At the end I used the return bars to help with their grooves, eventually I ended up with all the disks on.
Pictures: Key and disk controller in Vise | All disks loaded on key | Top shot with return bar
I then slowly put the plug housing on. The housing has a gap in the bottom of it; this should align with the first type of disks (ones with the locking bar gates). Finally I loaded the last return bar in.
Pictures: Housing showing gap for locking bar | Loaded housing with both return bars
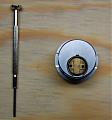
That was the way I did it, and it took several hours. I would suggest trying to load the disks directly into the housing and not onto the key / disk controller first. The housing keeps the control bar gates aligned, and then at a maximum it’s a matter of just aligning the other half of the disks and adding the return bars in. You can manipulate the disks using a pin or small screw driver. I would assume this should go much faster, but after spending a couple hours I didn’t want to take it all out to try again. Finally A professional has provided that the way suggested by Abloy. Abloy suggests you load the disks into the housing, use Vaseline or a wire tool to keep the return bars in place, and load them this way. A picture of the wire tool:
After all the disks are reloaded and you have the return bars in you are over the hump. Apply the locking washer back on top, then insert the disk controller. Next reload the springs for the locking bar, and put the locking bar in its groove, place the profile plate on the end and slowly load it back into the cylinder. Right before it’s all the way in, put the locking bar bracket on top, and push it the rest of the way in. Now test it and make sure its working, if so put the cam back on and your done!
15 comments15 Comments so far
Leave a comment


Love the article and thank you again for mentioning me 🙂
Keep up the good work, as it seems you are loving it 🙂
Very nice lock ! And yes, it does seem you are liking it :0
Hi Mitch,
Nice article, good detailed. Definitely another angle as that I have written my articles. If people ask me if it’s hard to assemble a protec, I will recommend this article.
Han Fey
The Netherlands
I enjoyed reading your description, and seeing your pictures. It does occur to me, though, that there is a bit of a contradiction here. You are careful to protect your intellectual property with a copyright on each photo, but the photos freely depict the intellectual property of someone else.
Sure Tom, my primary goal is to just ensure no one reproduced my photos without first seeking permission. It is not an uncommon practice even when the photos are of others properties. If you are looking to use one of more of the photos let me know and I am sure we can work something out.
Great work, i just got my hands on an abloy 330 cutaway.
lovly web site
Hi Alan, you do get around don’t you!
Nice work Mitch 😉
http://www.youtube.com/user/fortuna751
Wow, impressive detail. I spent a few hours getting acquainted with assembling Abloy’s Disc Lock Pro. The correct insertion of the Disk Retainer/Controller was the hardest bit to master!
Keep up the good work
Julie
Also, can I use your photos (With full reference) on my lockchick blog? Please can you reply here to let me know? I would not use before asking or without permission.
Many thanks
I am trying to reassemble a Protec lock. Unfortunately I dropped it and now have just a collection of parts – so I have the additional issue of working out which disk/spacer goes where.
Please clarify “embossed side down”. Does that mean the raised side goes down or the dished side?.
Thanks!
I finally got my Protec back together. I built it in the cylinder (plug housing) rather than on the disk controller.
Working out the position of the disks was a challenge. However, it is easy to identify the #0 (bottom and middle) and #6 disk positions. In my case that accounted for five disks. For the remaining six disks I divided them into groups based on the heights of the associated key cuts and tried alternatives. Then I used the disk controller and key to check which was right, one disk at a time, turning the key 90 degrees and inspecting the outcome.
The spacer washers were another challenge. I still don’t really understand how I got them right.
The only tools I used were some tweezers and a paper clip, plus a dab of vaseline.
Thanks to your perfect description I did the reassembly in an half hour.
Perfect work!
Just FYI, I did it the second proposed way. Aligning the discs with return rods in the housing is much easier than doing that on the disc controller.
DREAM GAMING
Making The Cut – Mitch Capper